There is something uniquely satisfying about finishing something that you started and putting it out for the world to access and use.
I had heaps of fun making this game and learned a ton.
Lessons from game #3
Sometimes you have to cut features
I have started following this process when designing my games but I always add some nice to have features to my design in the (at this point unlikely) event that I finish the game early and can add some pizaz.
A couple of guidelines that I put on myself for this 1 game a month challenge was to try to make each of the games touch friendly and have some multiplayer component.
So far so good for the touch friendly part, but for this game, the multiplayer had to be cut to meet the deadline.
It has probably been done before
To be honest, I wasted a couple days trying to figure the camera thing out by myself without looking up anything on the internet about how it had been done before.
This was a terrible idea.
Most features in games have been done multiple times before and there is a lot of good information about the patterns and pitfalls involved in them. Use these resources to save time and headaches.
You can cheat a little at art
Although I really like to sketch on paper, I haven’t really found a way to draw on a computer that I actually want to sit down and do.
This was one of my hangups for the last year or so with making games, and why I waited till the last day to make the login and instruction pages. Not to mention, I haven’t spent enough time with Monkey-X’s fonts and such and the default one for drawing text to the screen is not really pretty.
But I head faked myself into creating it in a way that I was more comfortable figuring out.
By day I am a web programmer. So I simply took the tools that I already know for making a screen look good (html, css) and applied them to this problem.
Using a screen shot from the game and a little css magic, I made a webpage that looked like a little home screen for the game (complete with start button) and then took a screen shot of it.
Then to make the button work, I drew a rectangle to the screen and over played it on the button to figure out the dimensions and set up a touch/click listening event for that area.
Voila, cheating at art!
To Sum up
Get to the MVP (Minimum Viable Product) first, then add other features.
When you are stuck, don’t bang your head against the wall. Get help.
Use your existing skills to find away around tough or annoying parts of the process (or see if you can get someone else to do them)
Game #3 — Evolve or Die
(itch.io seems to be down right now, will update post with link to game as soon as possible)
Most side or hobby projects tend to get left to gather dust after the first flurry of excited programming. I know this all too well and have started several projects before with good intention only to have them become forgotten and never finished.
Fortunately, I have been learning some techniques to prevent this from happening and to finish more often and faster. So here is a list of things that can help you complete all the little side projects you start.
#1 — Break the Main Problem into Little Sub-Problems
This is by far what has been most effective for me when working on a project. Many times we procrastinate on a hard problem because we aren’t sure how to approach it or continue on it. We get stuck mentally and just stop working on it altogether.
I have found that picking a small piece of the problem, figuring it out then repeating is super effective.
Keep a piece of paper and a pen or pencil near your computer. When you get stuck or it just seems hard to work, look at your problem and write down on your sheet of paper a small piece to figure out. Then just work on that smaller problem until it is solved.
For example on game #3 that I am working on right now, I have several smaller problems that the game has been broken down into.
Draw player to screen
Draw plants to screen
Move player to a point that was touched or clicked
Have player eat a plant if they collide
Make player grow if enough plants have been eaten
Make some enemies
Have the enemies move randomly
Have the enemies eat plants and grow
And there are a few more sub problems that I will be working on later this week.
#2 — Commit to a Scheduled Time to Work on the Project
This one is absolutely the main way to see a project through. Just make it part of your schedule.
The best part of the day to work on it is first thing after you get up. If you work on it before all the stuff you “have to do” gets in the way and wears you out, it is much more likely to get done.
If you do better work in the evening that is fine too, just make sure that the time is set aside and you remove distractions (phone notifications, tv, etc).
Since I am employed full time and that employment involves programming, doing more programming once I got home from a full day of work was difficult. So I actually started getting up an hour earlier every morning just to work on building these games a little each day.
And it works!
Cannot emphasize the schedule enough. Just do it.
#3 — Have a Good Reason to Do the Project in the First Place
If you don’t have a good reason to start the project it will probably wither and die.
The best thing you can do before you start any programming project (any project at all really) is to ask yourself what the end result should be.
The answer to that question should probably fall into 1 of 2 categories.
1. A Learning Project
It is often best to use a small project to learn a new programming language, framework, or technique. A project in this category does not have to be pretty. It is simply for you to learn how to do something.
However, you need to be specific about what you intend to learn.
I am using this one game a month challenge to learn several things including basic game creation techniques, rapid prototyping, and the Monkey-X programming language and framework.
2. A Project that Solves a Need
Often referred to as “scratching an itch”, it could be your own itch or someone else’s. The point is that it solves an unmet need.
Making software that will get used either by you or others on a regular basis is a good motivator for finishing a project. An added bonus is that you made the world a little bit better place to live.
#4 — Get Help When You Are Stuck
I recently read an interesting statement that there are no limit to resources, just to resourcefulness.
There are friends.
There are forums.
There are blogs.
There are books.
There are sites like Stack Overflow.
There are a lot of resources if you just look for them.
#5 — Have Some Accountability
There are a few different ways to do this and I will only cover a couple.
Blog About It
Obviously I am doing this and it definitely helps when it comes time to sit down to write if there is something that you have done this week to write about.
It also helps you track your progress and put down ideas to come back to later. Sort of a developer’s journal.
Find a Friend
One of the secrets of successful people is they form “Masterminds”. This is a fancy way of saying that they form a group to share ideas and keep each other accountable for what they say they will work on.
If you can, find a friend who is doing a side project and help keep each other accountable on a weekly basis.
To Summarize
Its almost midnight and the laptop is on its last 5% of battery so I will sum up.
Break your problem up into manageable pieces.
Schedule a time to work on your project and stick to it.
Have a specific reason to be doing the project.
When you are having difficulty, get help.
Write about your project or find a friend to help you stay accountable.
If you are not doing these 5 things and you start doing them for new projects, you will find yourself finishing and enjoying your projects more.
After a week of absolutely no productivity to speak of, I have finally been able to sit down and work on game #3 some more. Very excited about this game as I am learning a lot about different aspects of game programming.
Today, I had a simple goal of adding boundaries to the world. Before the player could just go off in one direction to their hearts content (or until their position was a number too big for the processor I suppose).
Maybe I hadn’t looked at the code in a bit too long, or maybe allergies are affecting my work. Regardless, the first solution I implemented seemed to do absolutely nothing. So I did the only debugging thing that I know to do when nothing else is working.
When in Doubt, Print Debugging Information
My first solution was to turn the players velocity around if their position crossed the boundaries.
This actually did have an effect. When you took your finger off the screen (or lifted it off the mouse button), the character would stop (may add this as default behavior).
The problem was, as long as you kept your finger down the game would just let you go and go still. So I printed the velocity and position to the screen to see what was happening.
Feedback Is Important
The moral of the story is that feedback and information beats guessing every time. It will help you make faster, better corrections.
With the feedback to the screen, I could see what was happening as I made code changes. It helped reason through what the next move should be.
Since changing the velocity was not working, I decided to just set the players position to the edge and their velocity in the X or Y direction to zero (depending on the edge they hit).
This had the wonderful affect of making the camera move without the player when you hit a boundary.
Fortunately, swapping the order the player and camera were updated solved the problem.
One of the keys to successfully finishing a game is starting with a design. This does not mean that the design has to be super detailed. It could be a couple bullet points on the back of a napkin or notecard.
Everybody can design games. However if you want to design good games, you should probably learn about it at least a little bit.
Podcasts are a great way to learn and can often be used while you are
Driving to work or school
Working out at the gym
Going for a run
Washing dishes
Using the bathroom
Possibly even at work (depends on your job)
And I am sure you can think of other times that you can fill with some learning through podcasts. I Hereby Give You the …..
There are actually 2 podcast series on this site. The Game Dev Cast that talks about game development, and Wait, What, Game Design? in which the panel on the show are going through the process of learning game design (not just video games) and they have been presenting a game design challenge at the end of each show that they discuss on the next show.
This site at the time of this writing is in “maintenance mode” but I believe it will be back in production mode soon. I have listened too it over the past couple months and have gotten some good ideas that have influenced my game design.
Again not just focused on video games, but game design in general. Most of the shows are interviews with various people from the game development and design community. A few of them are discussions about the projects that the hosts of the show are working on.
Although I have not been able to listen to many of these episodes yet, this podcast has an excellent episode for how to get started making games. 101: Game Dev 101
I first heard this mentioned on the Game Dev Cast game design series. Mark Rosewater, head Magic:The Gathering designer for Wizards of the Coast, wrote an excellent article about the 10 Things Every Game Needs . He has an audio version on his Drive to Work podcast.
I have started using his checklist as I design my games and it is super valuable.
Read it, listen to it, take notes. This is the best breakdown of the essentials of good game design I have come across.
Hope This Was Helpful
This should get you started in the right direction and gives you a valuable way to spend some of your free audio time. I will add a section of the resources page with these podcasts and any others I come across later on.
Creating a 2D camera in a video game is a little trickier than I thought. I started out doing it wrong (didn’t look up enough info), and wasted a lot of time trying to figure out what was going on. Hopefully, I can remove some of that trickiness for you and give you a nice simple example of using a 2D camera in a game.
I looked up stuff in the Monkey X forums and came across this article, but it wasn’t plain enough. So this is my attempt at creating the article I wish existed for Monkey X users and 2D following cameras.
This is all code taken from game #3 in my one game a month challenge. Feel free to use it as needed.
The Theory Behind the Code
I started out by watching the tutorial video for camera movement in the Creating a Simple Game Tutorial. The problem was that it just moves the camera down and is not connected to player movement at all.
I wanted to follow my player around in all 4 directions to increase the play area beyond the screen size. This is where my problems began.
Most of the drawing stuff like scaling and rotating rely on matrix math. Moving the “camera” is done by translating the drawing matrix. This is a fancy way of shifting it one way or another.
So What Does Translating Have to Do With the Camera?
The trick is, when we use a camera in 2D, we aren’t actually moving the camera to follow the player. Instead, we treat the drawing space like a little window into the game, and move the game world into the view.
Think of it like a tablet or smartphone, if you want to see whats to the left you swipe to the right. If you want to see whats down below, you swipe up. Its the same with the camera, if you want to follow your player to the right, you move the world and player left and into your view.
Its that simple. Reading this discussion is what made it click for me.
The Trick
You need to determine how far to move you camera. I ended up using the velocity that the player is moving. However, you have to subtract the velocity from the camera’s “position” to get it to behave right.
This is one of the things I messed up before I figured out that left is right and up is down.
Without further ado, here is a simplified version of…
The Code
So before we begin with the camera we need a few things.
1. A character to follow around
2. A way to move the character
3. Something that lets us know when the character is moving
A character to follow and way to move him
Lets create a simple player with a couple of “vectors” that represent his position and movement.
Class Vec2D
	' Vec2D class shamelessly borrowed from Jim's Small Time Outlaws
	' Youtube channel on creating basic games with Monkey X

	Field x:Float
	Field y:Float

	Method New(x:Float, y:Float)
		Set(x, y)
	End

	Method Set(x:Float, y:Float)
		Self.x = x
		Self.y = y
	End

	' My own personal touch to Jim's code
	' Calculates Euclidean Distance
	Method Distance(point:Vec2D)
		Local xdelta:Float = point.x - Self.x
		Local ydelta:Float = point.y - Self.y

		Return Sqrt(xdelta * xdelta + ydelta * ydelta)
	End

End
Class Player

	Field position:Vec2D
	Field old_position:Vec2D
	Field velocity:Vec2D
	Field target:Vec2D
	Field distance:Float

	Field speed:Float

	Method New(name:String, x:Float, y:Float, speed:Float)
		Self.name = name
		Self.position = New Vec2D(x, y)
		Self.old_position = New Vec2D(x, y)
		Self.speed = speed

		Self.velocity = New Vec2D(0, 0)
		Self.distance = 0
	End

	Method Draw()
		SetColor(0, 255, 0)
		DrawRect(position.x, position.y, 10, 10)
		SetColor(255, 255, 255)
	End

	Method Update()
		' update position
		Self.old_position.Set(position.x, position.y)
		Self.position.Set(position.x + velocity.x, position.y + velocity.y)
		' update velocity
		If (target <> Null)
			If (position.Distance(target)) < distance
				distance = position.Distance(target)
			Else
				' we are not getting closer to the target anymore so stop moving
				velocity.Set(0, 0)
			End
		End
		' update size
		If exp >= 10
			size += 1
			exp -= 10
		End
		' update box
		Self.box.Set(position.x, position.y, 10, 10)
	End

	Method SetTarget(x:Float, y:Float)
		Self.target = New Vec2D(x - 5, y - 5)

		distance = position.Distance(target)

		Local deltax:Float = Abs(target.x - position.x)
		Local deltay:Float = Abs(target.y - position.y)
		Local sum_delta:Float = deltax + deltay

		If (target.x > position.x)
			velocity.x = speed * (deltax / sum_delta)
		Else If (target.x < position.x)
			velocity.x = -speed * (deltax / sum_delta)
		End

		If (target.y > position.y)
			velocity.y = speed * (deltay / sum_delta)
		Else If (target.y < position.y)
			velocity.y = -speed * (deltay / sum_delta)
		End

	End

End
This is a slightly complicated player class that moves the player toward some target position that the user touched on the screen. You can read more about the Vec2D Distance method and the math behind the player SetTarget method in my previous article.
Something that lets us know our character is moving correctly
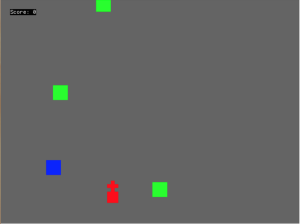
This particular game is about eating things (think Pacman crossed with snake and my own particular twist). So we are going to put some little dots on the screen for our player to eat. I called them plants (the code that lets him eat them is removed from this example, you can find the full game code on github).
Class PlantLife
	Field position:Vec2D

	Method New(x:Float, y:Float)
		Self.position = New Vec2D(x, y)
	End

	Method Draw()
		SetColor(0, 100, 255)
		DrawRect(position.x, position.y, 5, 5)
		SetColor(255, 255, 255)
	End

End
We will be drawing a few of these to the screen as points of reference to see how we are moving.
The Camera
Surprisingly, the Camera class is really simple.
Class Camera
	' Camera class alos shamelessly borrowed from Jim's Small Time Outlaws
	' Youtube channel on creating basic games with Monkey X
	' Great stuff you should seriously check it out
	Field original_pos:Vec2D
	Field position:Vec2D

	Method New(x:Float=0, y:Float=0)
		Self.position = New Vec2D(x, y)
		Self.original_pos = New Vec2D(x, y)
	End

	Method Reset()
		Self.position.Set(original_pos.x, original_pos.y)
	End

	' My own take on the update method though
	' This is what we use to follow the player around
	Method Update(velocity:Vec2D)
		Self.position.x -= velocity.x
		Self.position.y -= velocity.y
	End
End
Now Putting It All Together
The actual game app is where it all comes together.
Import classfile

Class AppName Extends App

	Field player:Player
	Field cam:Camera

	Field plants:List
	Field max_plants:Int

	Field map_width:Float
	Field map_height:Float

	Method OnCreate()
		SetUpdateRate(60)

		map_width = 1000
		map_height = 1000

		max_plants = 100
		plants = New List()
		player = New Player("Me", 320, 240, 4.0)
		cam = New Camera( )
		GeneratePlants()
		' Set the random seed for this instance of the game
		Seed = Millisecs()
	End

	Method OnUpdate()
		‘ Get our target position to move the player
		If TouchDown(0)
			player.SetTarget(TouchX(0) - cam.position.x, TouchY(0) - cam.position.y)
		End
		‘ Update the camera before we update the player
		‘ Because we don’t want to move the camera before the player starts moving
		cam.Update(player.velocity)
		player.Update()
		‘ Refill our eaten plants
		GeneratePlants()
	End

	Method OnRender()
		Cls(255, 255, 255)
		‘ Push the matrix so we can draw a HUD later
		PushMatrix()
		‘ Move our world to the camera position
		Translate(cam.position.x, cam.position.y)
		‘ Draw in our player and our plant life
		player.Draw()
		For Local plant:PlantLife = Eachin plants
			plant.Draw()
		End
		‘ Pop the matrix back out
		PopMatrix()
	End

	Method GeneratePlants()
		‘ draw some plants on the screen so we can see when we move
		Local plant_count:Int = plants.Count()
		If plant_count < max_plants
			For Local i:Int = plant_count Until max_plants
				Local xpos:Float = Rnd(25.0, map_width - 20)
				Local ypos:Float = Rnd(25.0, map_height - 20)

				plants.AddLast(New PlantLife(xpos, ypos))
			End
		End
	End
End

Function Main()
	New AppName()
End
And that should give you a simple skeleton game with a player that moves around to wherever you touch on the screen and is always in the middle of the camera.
Bonus post coming Wednesday this week on Game Design podcasts.
When I went to college to study computer programming, it was not with the intent of making video games. The school I attended required that you have a minor, and since computer programming was all I wanted to do at the time, I chose the one that required the least classes, Math.
Fast forward a couple years and I am sitting at my computer trying to think of how to handle getting an object to move to where it gets clicked. Little did I know how useful that math minor would be in tackling the problem.
Euclidean Distance
The solution I have currently implemented relies on 2 things, the Euclidean Distance and the vector needed to move in the right direction.
Euclidean distance is a fancy way of saying distance between 2 things on a flat surface. The world is round so it is usually only accurate over small distances, but for a 2D video game, the world is completely flat so it works perfectly.
Don’t let this statement scare you, but it is basic trigonometry. As long as you know the X and Y coordinates of your 2 points, it is surprisingly simple to calculate.
You need the hypotenuse of a right triangle where the difference between the X coordinates of the 2 points is 1 side, and the difference between the Y coordinates of the 2 points is the other side.
The distance is then the square root of these sides squared and added together. You might know this formula by its more common name, the Pythagorean Theorem.
The Monkey code to calculate the distance between 2 points looks something like this:
Function Distance(point1:Point, point2:Point)
  Local xdelta:Float = point1.x - point2.x
  Local ydelta:Float = point1.y - point2.y

  Return Sqrt(xdelta * xdelta + ydelta * ydelta)
End
So now that we know how far away our object is from its target point, how do we move it there?
Calculating Velocity
This is actually a little bit simpler.
So lets assume our object has some speed that we want it to move at, for example I will use 4 pixels per update. So now when we touch or click on the screen, we want the object to start moving at 4 pixels per update towards the point we touched.
Determining what part of the speed is in the X direction and what part is in the Y direction is done by finding what part X and Y have in the distance.
Now we don’t want our Euclidean distance from before. Now we just want the X and Y distances. So our X portion of our speed would be:
speed * X-distance / (X-distance + Y-distance)
and our Y portion of our speed would be:
speed * Y-distance / (X-distance + Y-distance)
I couldn’t find a nice place that spells this out without being too formal so my simplified version will have to do.
The Monkey code for this would look something like this:
Local deltax:Float = Abs(target.x - position.x)
Local deltay:Float = Abs(target.y - position.y)
Local sum_delta:Float = deltax + deltay

If (target.x > position.x)
	velocity.x = speed * (deltax / sum_delta)
Else If (target.x < position.x)
	velocity.x = -speed * (deltax / sum_delta)
End

If (target.y > position.y)
	velocity.y = speed * (deltay / sum_delta)
Else If (target.y < position.y)
	velocity.y = -speed * (deltay / sum_delta)
End
If the X difference was 12 and the Y difference was 23 then the resulting velocity in the X direction would be:
Giving us a nice straight line towards our target point.
Simple 2D Movement
Combining the velocity equation with the distance lets us move our object toward the target, checking the distance as we go.
As long as the distance is decreasing, we are heading in the right direction. But when the distance is 0 or when it starts to increase, it is time to stop because we have arrived or passed our target.
I hope this helps jumpstart some simple 2D movement for you. I will release a full working example in game #3 (coming soon) in my 11 games in 11 months series. Until then, keep making awesome things.
I have had a complete blast making this game! It was one of the most challenging and rewarding things I have ever done. You can check it out here.
Repel Boarders
This game is a huge detour from the first one. While Prism Ship was a Galaga-esq shooter, Repel Boarders is a turn based tactics game. A video game collecting friend tells me its very much like Advanced Wars.
Challenges
Doing a turn based game presented a lot of challenges. First, most tutorials for game engines are trying to show off things like movement, animation, and how great their frame rate is. I actually have yet to stumble across a good turn based tutorial. In other words, it felt like blazing a new trail. If you know any good tutorials on turn based games, I will be all ears. There is a lot more I could learn about them.
Challenge 1 – Input
One of the problems I had initially was the input. I left the frame rate high, thinking I would try to animate the unit movement or attacks. This caused a lot of accidental double clicking.
The solution was two-fold, both time based. First and obvious was drop the frame rate. The screen does not need to be updated 60 times a second if you aren’t doing any animation. Second and similar was to check when the player last clicked or touch the screen and limit how fast to accept inputs.
Challenge 2 – Scope Creep
A second problem I had was wanting to do to much. I had to keep reminding myself that this was supposed to me an MVP of a game. Regardless, some cool extras snuck in.
These were mostly based on annoyances when testing. An information tab, health bars, and deselecting a previously selected unit were all things that probably could have been left out for the game to work, but they sure are nice to have.
Challenge 3 – AI or Network Multiplayer
Another problem, one that I am currently working on, is having an Artificial Intelligence to play against.
The initial concept of course was for it to be pure multiplayer and the combat system was initially just set up for a “hotseat” mode where you and your opponent are at the same computer. Unfortunately, this requires you to have someone else present who wants to play the game if you don’t want to play yourself.
Ideally, I would like to implement network multiplayer (with matchmaking of course), but that is not likely given the time constraint I put on myself. Its time to start on game 3 after all if I want to hit the 11 in 11 goal.
Oddly enough, writing an AI for the game appeared to be easier than writing a multiplayer server and interface. And it seems to be. A simple, random “AI” was actually only a couple hours of work. The AI currently knows nothing about the game state. It takes a list of units, moves, weapons, or attacks and picks one. That’s it. Nothing “intelligent” going on there. But for now its good enough. Maybe I will get to come back to this game and polish it like it deserves.
Lessons Learned
Timers are your friend when dealing with turn based games.
Watch the scope of your game. Build nice to haves only after the core mechanics are done.
Even multiplayer games need a way to be played when everyone else is asleep or doing something else.
I am currently working on breaking down the first couple games into some tutorials. Be looking for them next week.
One of my self challenges for 2015 is to create 1 game a month starting in February. So I decided to start with a classic type of arcade game, a scrolling shooter.
The first implementation of the game only moved when the player was using input to control the ship. As soon as the player let off the key or stopped touching the screen, the ship would stop. This did not feel natural at all. In order to give the game a smooth and more natural feel, I decided to introduce a friction factor so that the player is slowed down a little until coming to a complete stop. Like this
If velocity in x direction >= friction
velocity is reduced by friction amount
If velocity in x direction < friction
velocity is 0
Same for the y direction.
You may need to play around with what the friction value is to determine what feels natural. Also, the frame rate that you choose for your game will affect what this value is.
Note: you may need to account for both positive and negative velocities, depending on how you implement movement in your game.
While traveling to visit family this past weekend I was attempting to set up a simple high score server for Prism Ship. I decided to use Sinatra for the backend because it would allow me to make a very simple and quick server using only a couple of lines since I don’t need an interface of any kind. Little did I know this simple task would turn out to take several hours.
This was partly caused by my lack of familiarity with Monkey-X and partly allergies.
Backstory
I was staying with some relatives and the females all went shopping and what not. My brother-in-law had made plans to spend the afternoon gaming at a friends house (Dark Souls II anyone?) so I tagged along figuring I would just program while they played. Better than sitting in an empty apartment for 5 hours right?
I had been to this friends house before but forgot about the pets. Normally I don’t have any problems with dogs or cats and didn’t the last time I was there (which was probably because we spent a majority of the time outside on that visit). However, this visit caused very annoying allergy type symptoms to be present for 4.5/5 hours.
Now, the server was simple enough to set up. Just a few lines of Ruby using Sinatra to test.
require 'sinatra'
get '/' do
body "High Score List"
end
It’s really that simple.
First Problem – Different Domains
I noticed that despite following the instructions in the documentation for the brl.httprequest module in Monkey-X, I was not getting expected output. So I opened the dev tools in the browser and saw this: Access-Control-Allow-Origin: access denied
After a brief investigation, it seemed to be related to CORS (Cross Origin Resource Sharing). It was caused by trying to run the game on the localhost and accessing the Sinatra server running on Heroku. This is fixed with a little addition to the Ruby code: require 'sinatra'
get '/' do
response.headers['Access-Control-Allow-Origin'] = "*"
body "High Score List"
end
This is not very secure, but it fits our purposes for the time being.
Second Problem – Not Carefully Reading Documentation
A nose that is running because of excessive cat and dog dander will keep you from thinking straight and reading carefully. I missed an important line in the HttpRequest documentation that says – “Your application must continously call UpdateAsyncEvents at regular intervals (for example, once per OnUpdate) while an http request operation is in progress for it to complete.”
My little program was sending just fine, I could see the server send back a nice HTTP:200 code, but the game would not fire the OnHttpComplete method.
The very next time I sat down to work on this problem, it took less than 5 minutes of googling and reading to find the cause. I put the UpdateAsyncEvents line in and everything just started working.
Moral of the story
Read documentation carefully and try not to program somewhere that will cause you to have a runny nose (or other types of distractions).
So I had heard about Ludum Dare game jams before, but never participated in one. It just so happened that they were running a very loosely ruled 48 hour mini jam this past weekend and I submitted a game for it (and its actually kinda fun).
One of the hardest parts was I was trying to make the controls touch friendly, so it could be played on a smart phone or tablet (screen size/ scaling still needs to be made mobile friendly). The touch controls are a little more limited than the keyboard consequently. The keyboard allows movement in all 4 directions using WASD or the arrow keys while touch only allows left and right movement by touching to one side. I actually find it easier to drag my finger along under the “ship” to move it (which is why there is space under it).
Originally I was just drawing boxes to the screen, but forcing the browser to draw every update is a little slow and resource taxing so I made some simple graphics (that are essentially the same boxes) using a wonderfully useful and simple site called make8bitart. The interface is intuitive and very easy to use. Saving is as simple as dragging the image to your desktop from the browser. Highly recommend.
Lots of improvements to be made but not bad for my first game. Next week I will begin working on a simple high score server for it.